Quick start guide for Supabase users
Set up PostgresAI monitoring for your Supabase databases using the built-in Supabase integration in PostgresAI Console.
Overview
The Supabase integration uses OAuth to automatically discover your Supabase projects and provision monitoring — no manual database credentials or network configuration required.
Choose Starter ($16/cluster/month) or Scale ($512/cluster/month). Both include Full monitoring, Checkup reports, agent workflows, issues and action plans, email and Slack notifications when PostgresAI opens or updates an issue, and async support.
Starter covers the primary node with 14-day retention and no included expert requests. Scale covers one primary + up to 5 replicas in one cluster with 13-month retention, Grafana dashboards, Private RDS / PrivateLink, Trend analysis (Performance Cliffs and Walls), and two human expert requests per month on two topics. Scale responses are within 24 business hours, with a one-week issue conversation. Both plans offer two additional expert requests for $500 as a one-off pack; contact us for pack terms.
Included monthly expert requests expire at month end and do not roll over or accumulate. Purchased-pack terms are separate; contact us for details.
Partner-sponsored organizations use Scale with Billed to partner. A Supabase referral alone does not mean your organization is sponsored. Self-paying organizations choose and pay for their own plan.
Prerequisites
- A Supabase account with at least one project.
- A PostgresAI Console account. Sign up with Google, LinkedIn, GitHub, or GitLab.
- An organization in PostgresAI Console. Create one if you don't have one yet.
- A payment method on file (required for self-paying Starter and Scale plans). In your organization, open Billing, click Edit payment methods, and add a card in the Stripe portal.
Step 1. Start the Supabase setup
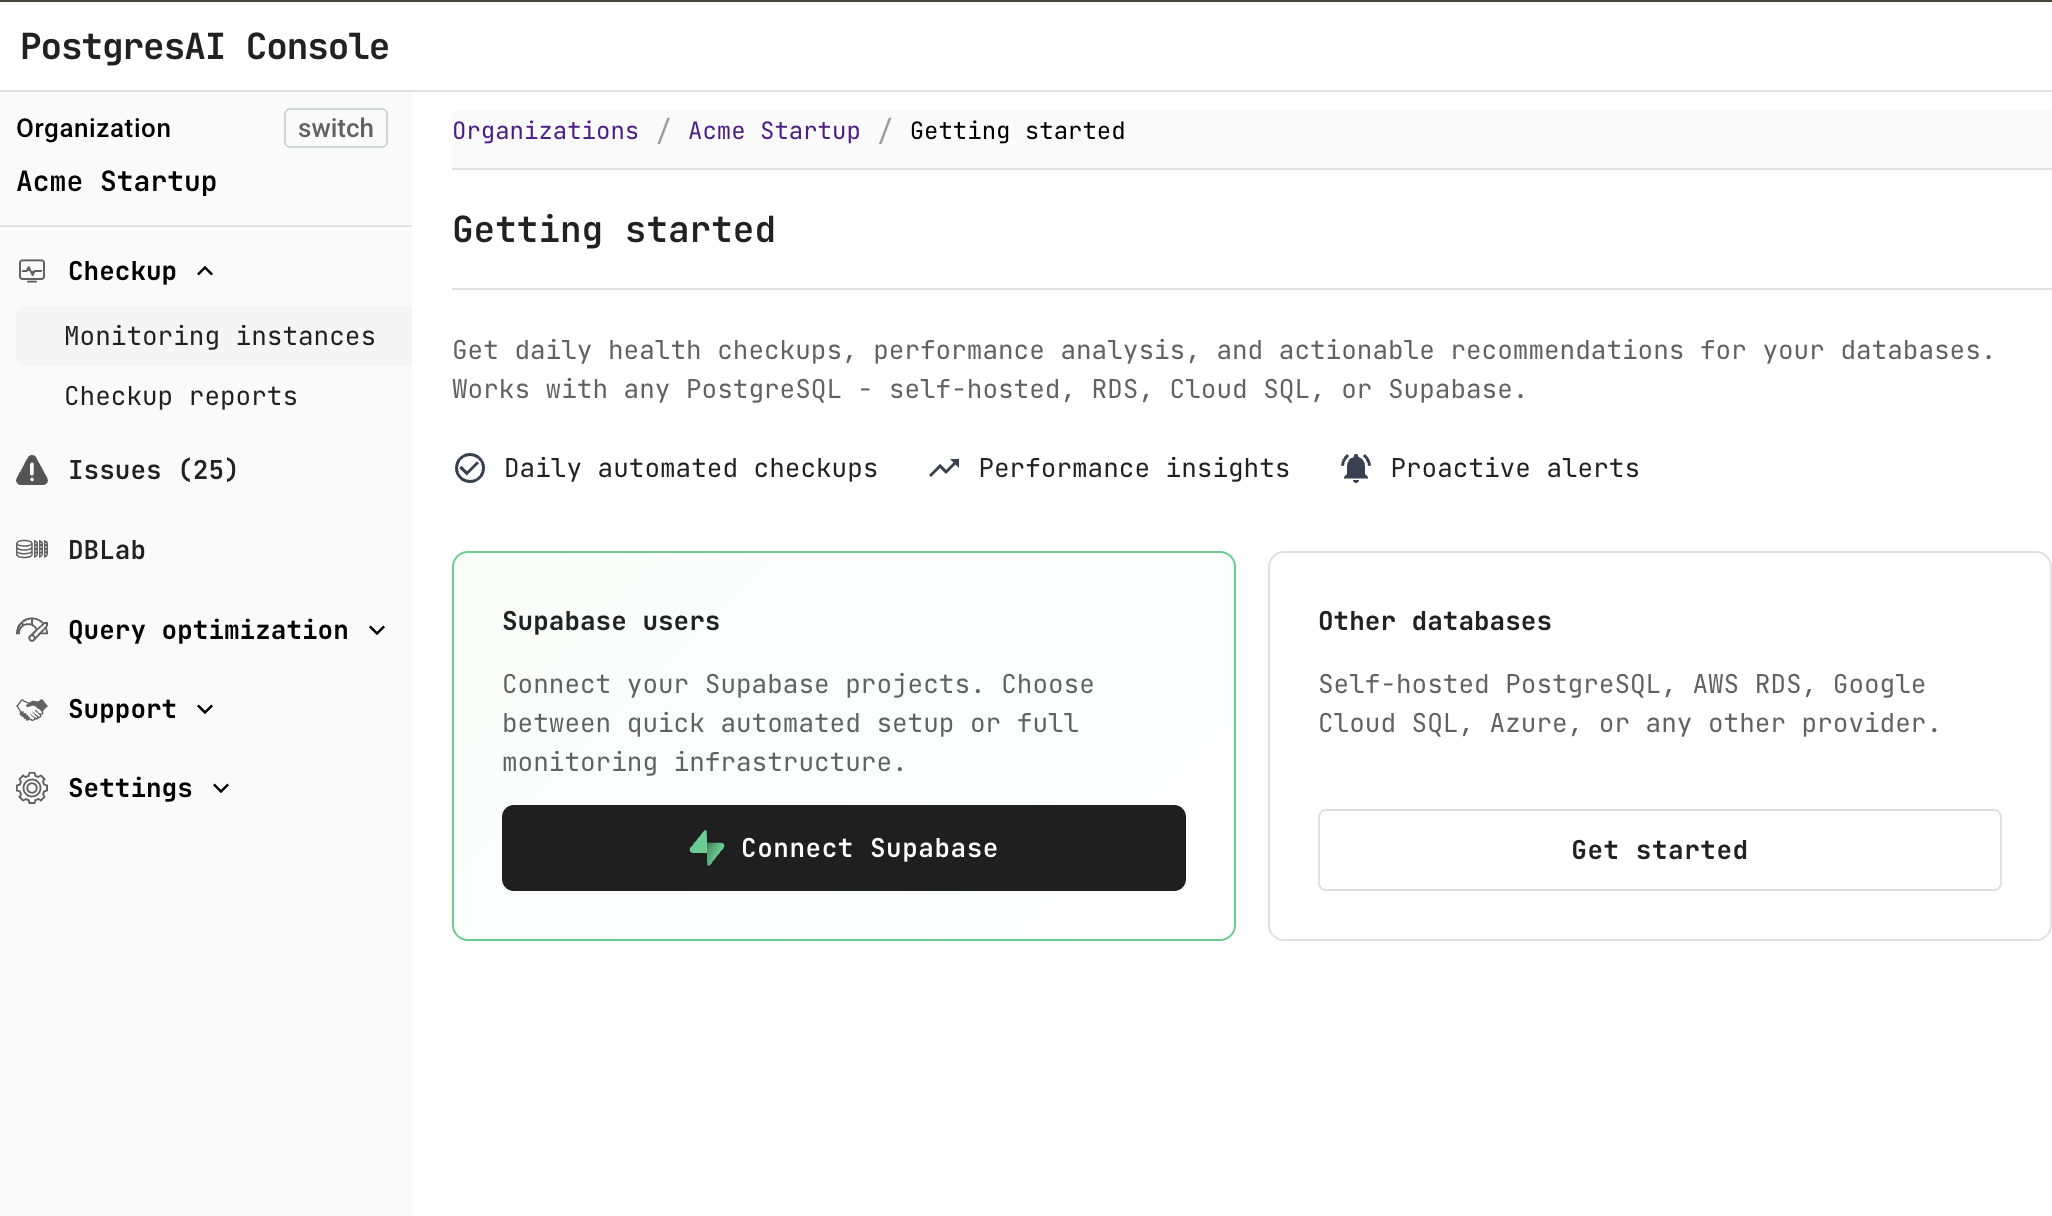
In PostgresAI Console, navigate to DB health — Getting started and click Connect Supabase.
Step 2. Choose your plan
Choose Starter or Scale on the monitoring plan page. Both use the same monitoring product; retention, node coverage, dashboards, and expert allowance differ. Enterprise customers can contact us.
See Pricing for the comparison. The selected plan is carried through setup. Partner-sponsored organizations see Scale billed to their partner instead of self-pay prices.
Step 3. Authorize Supabase access
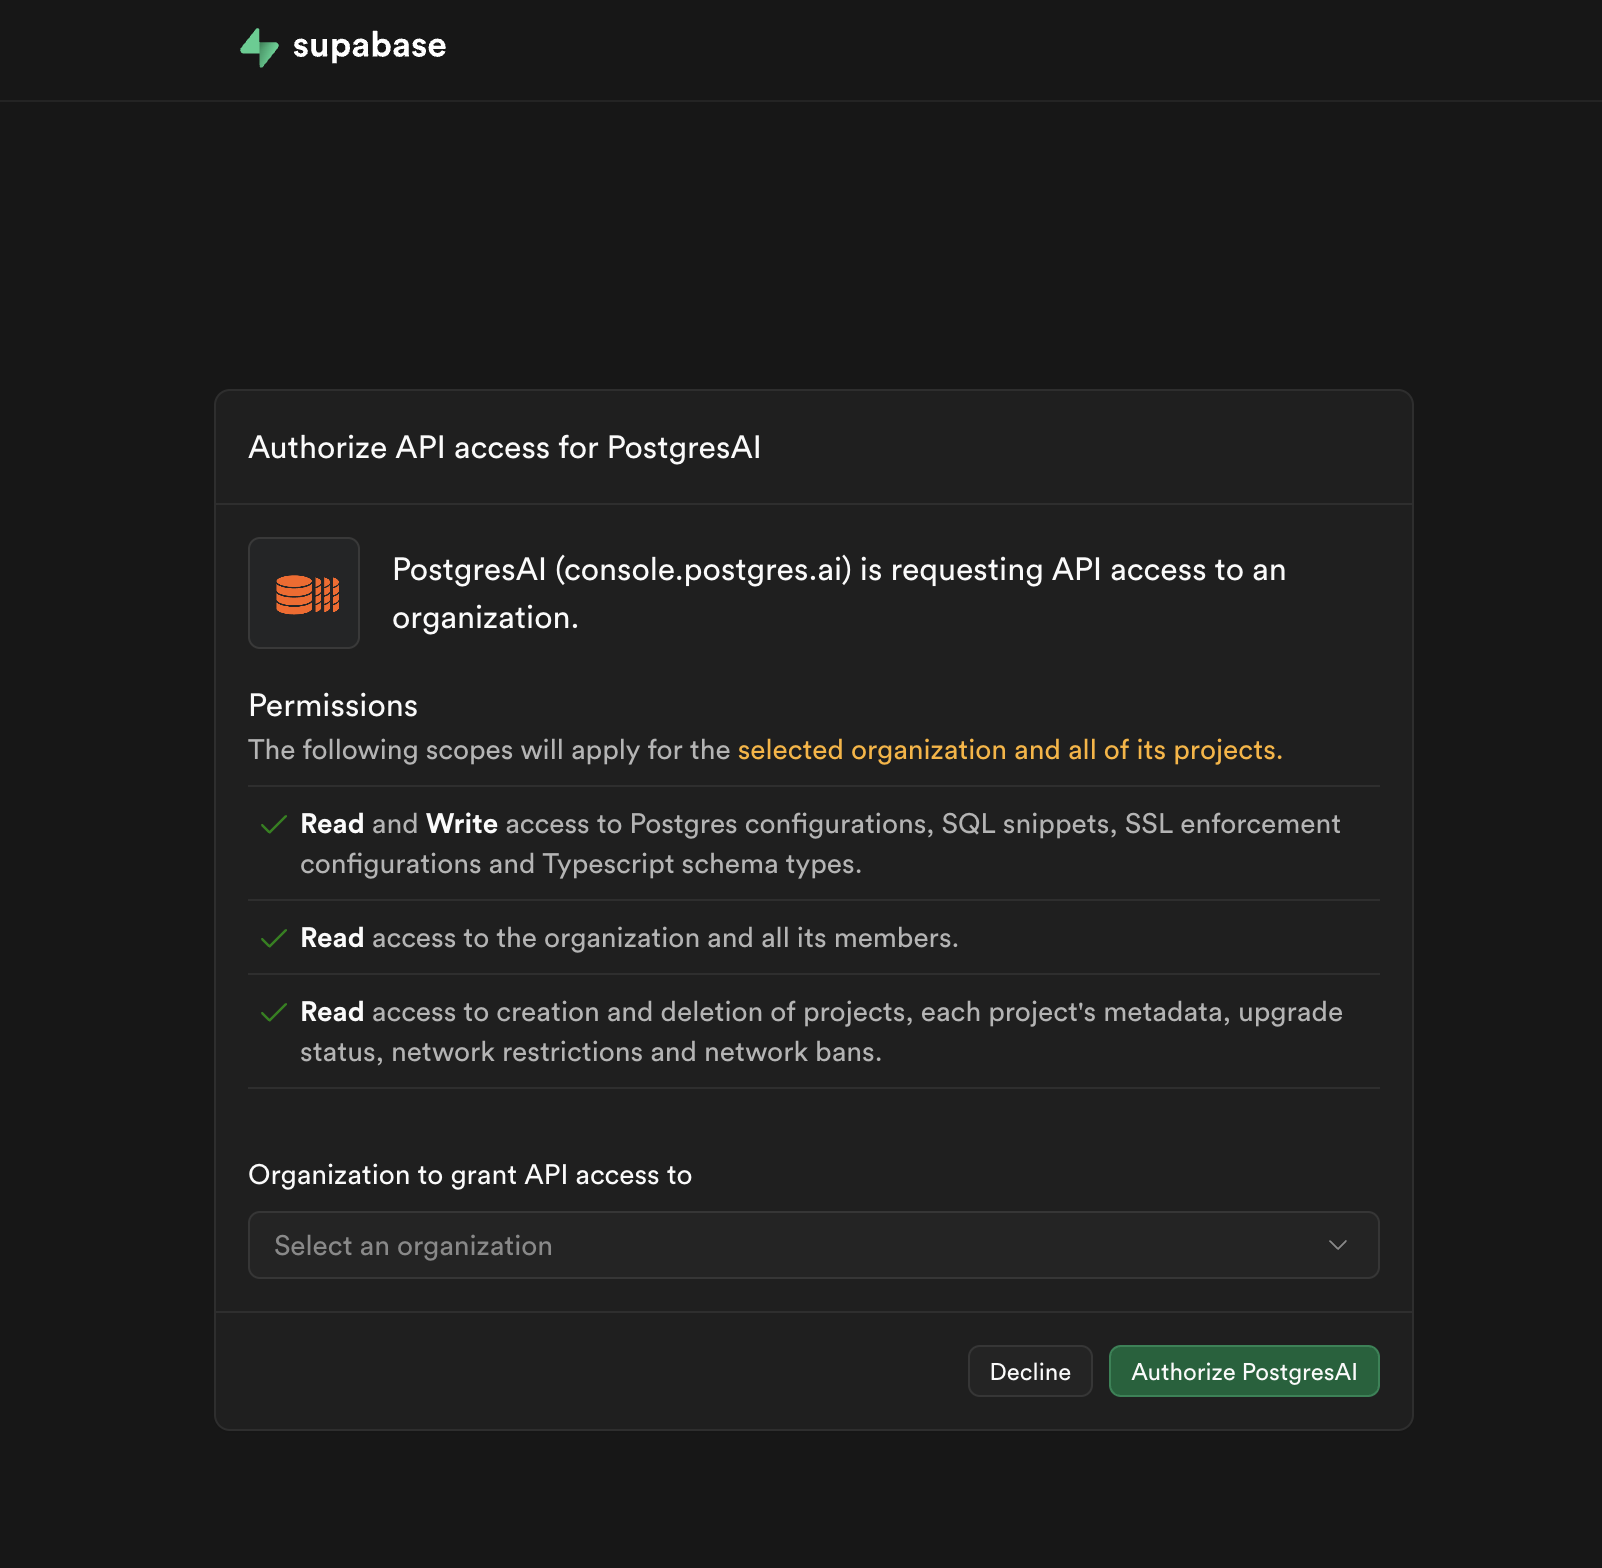
During setup, you are redirected to Supabase to authorize PostgresAI.
Review the requested permissions and select the organization you want to monitor, then click Authorize PostgresAI.
PostgresAI asks for three scopes: Projects:read, Database:write and Secrets:read.
Supabase asks for Database write access because PostgresAI creates the monitoring role through the Supabase Management API. For host stats, PostgresAI also reads the project's secret key on demand. It never stores the key, and each use is audit-logged.
Step 4. Select projects and deploy
After authorization, you are returned to PostgresAI Console.
- In Billing & plan, confirm your selected plan and payment method (or partner sponsorship).
- In Supabase project, select the Organization and check the Projects to provision.
- Optionally, expand Advanced setup to choose the cloud provider or cloud region.
- Click Deploy.
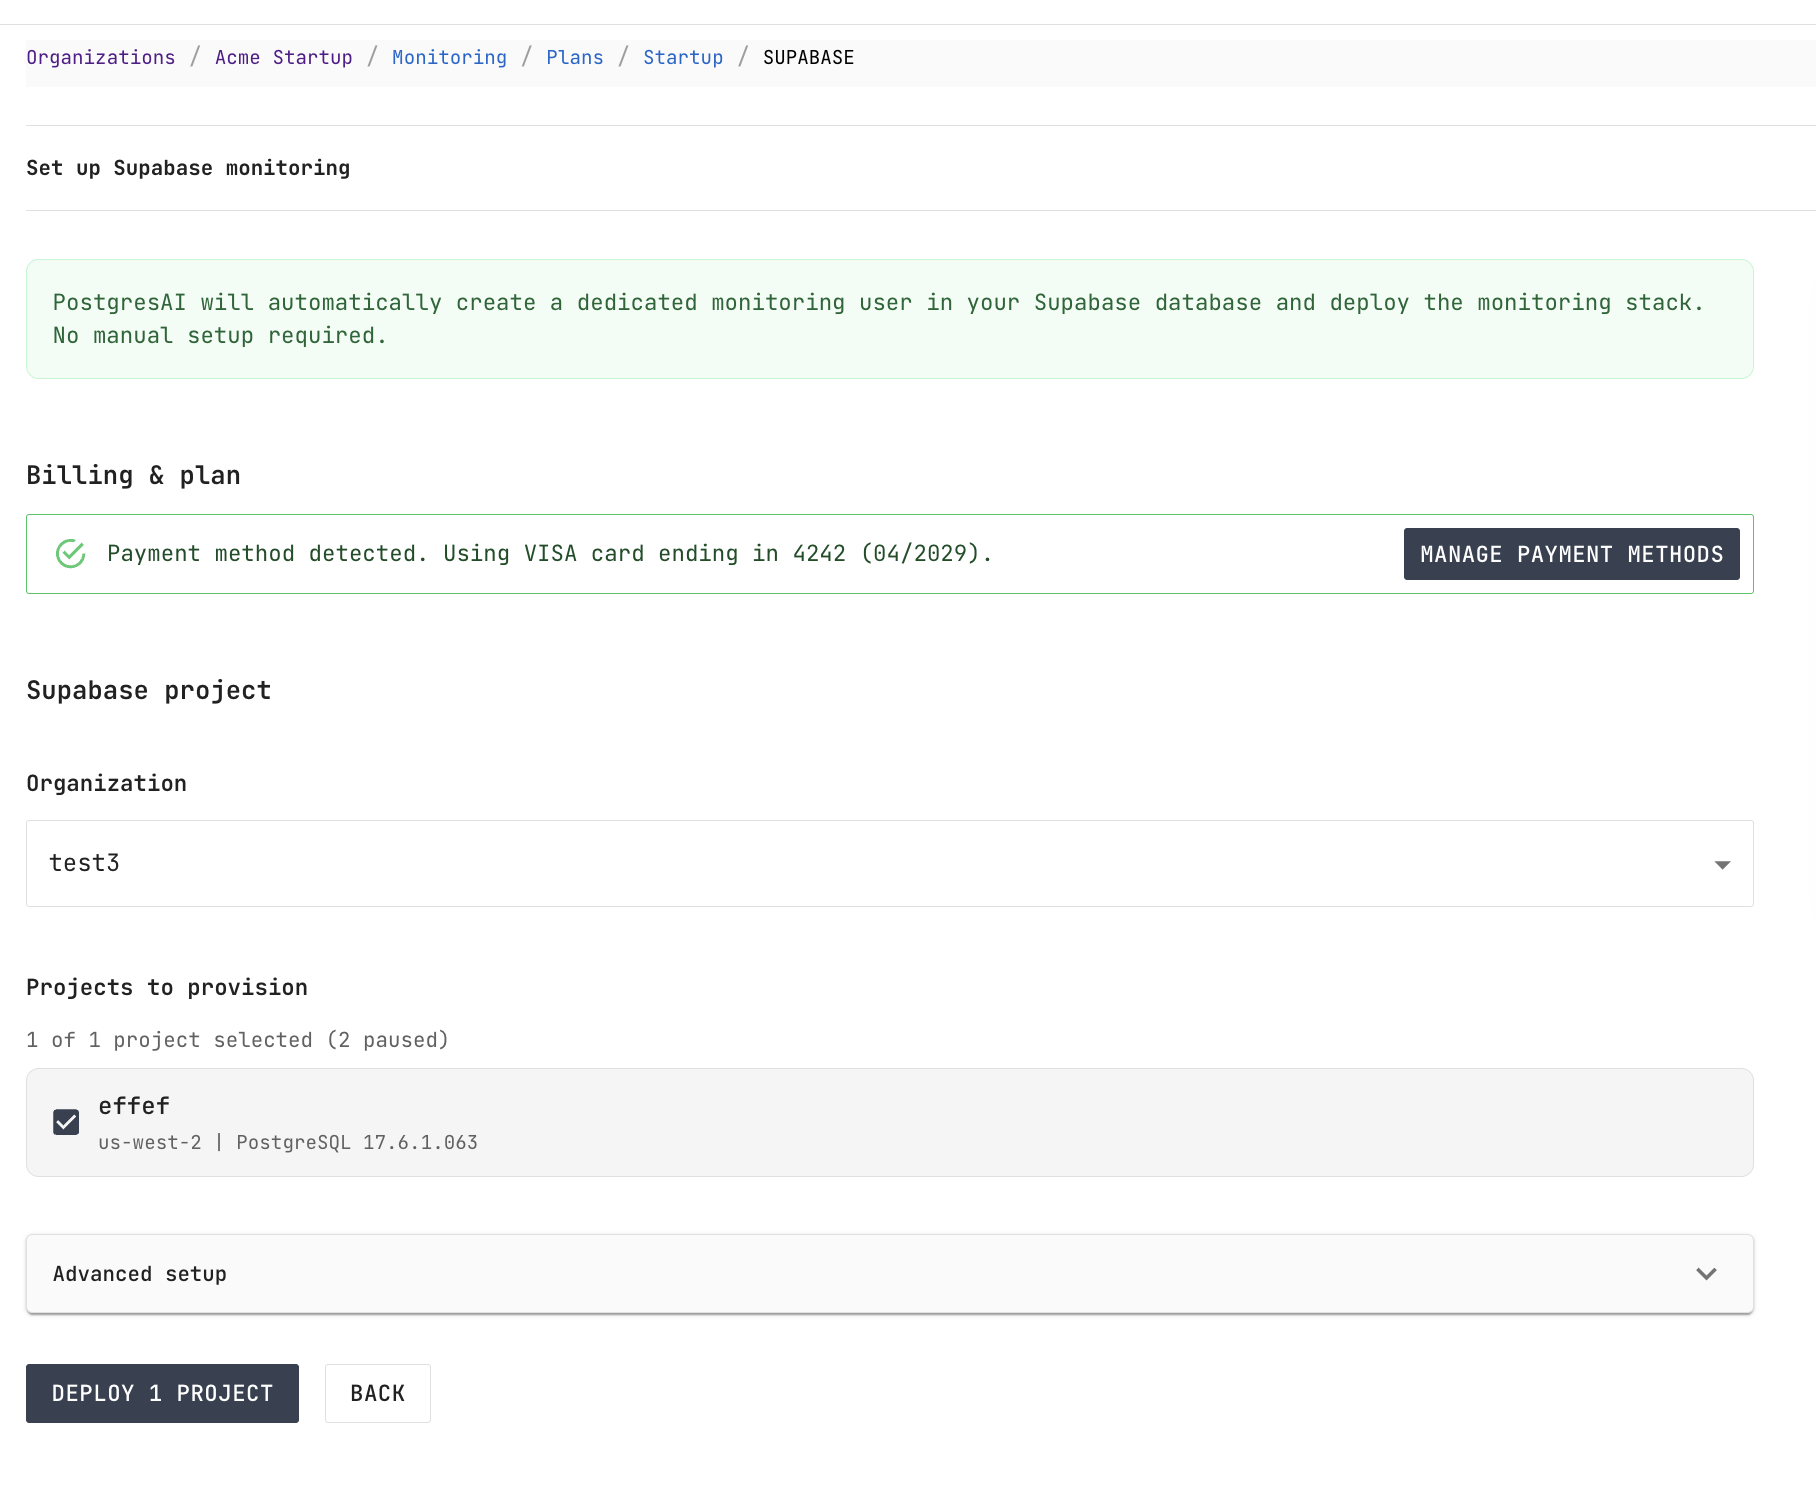
PostgresAI automatically creates a dedicated monitoring user in your Supabase database and deploys the monitoring stack. No manual database setup is required.
Step 5. Wait for deployment
After clicking Deploy, the monitoring stack is provisioned and configured. Track progress on the installation page:
- Waiting for SSH
- Provisioning VM
- Installing base packages
- Starting monitoring services
- Finishing setup
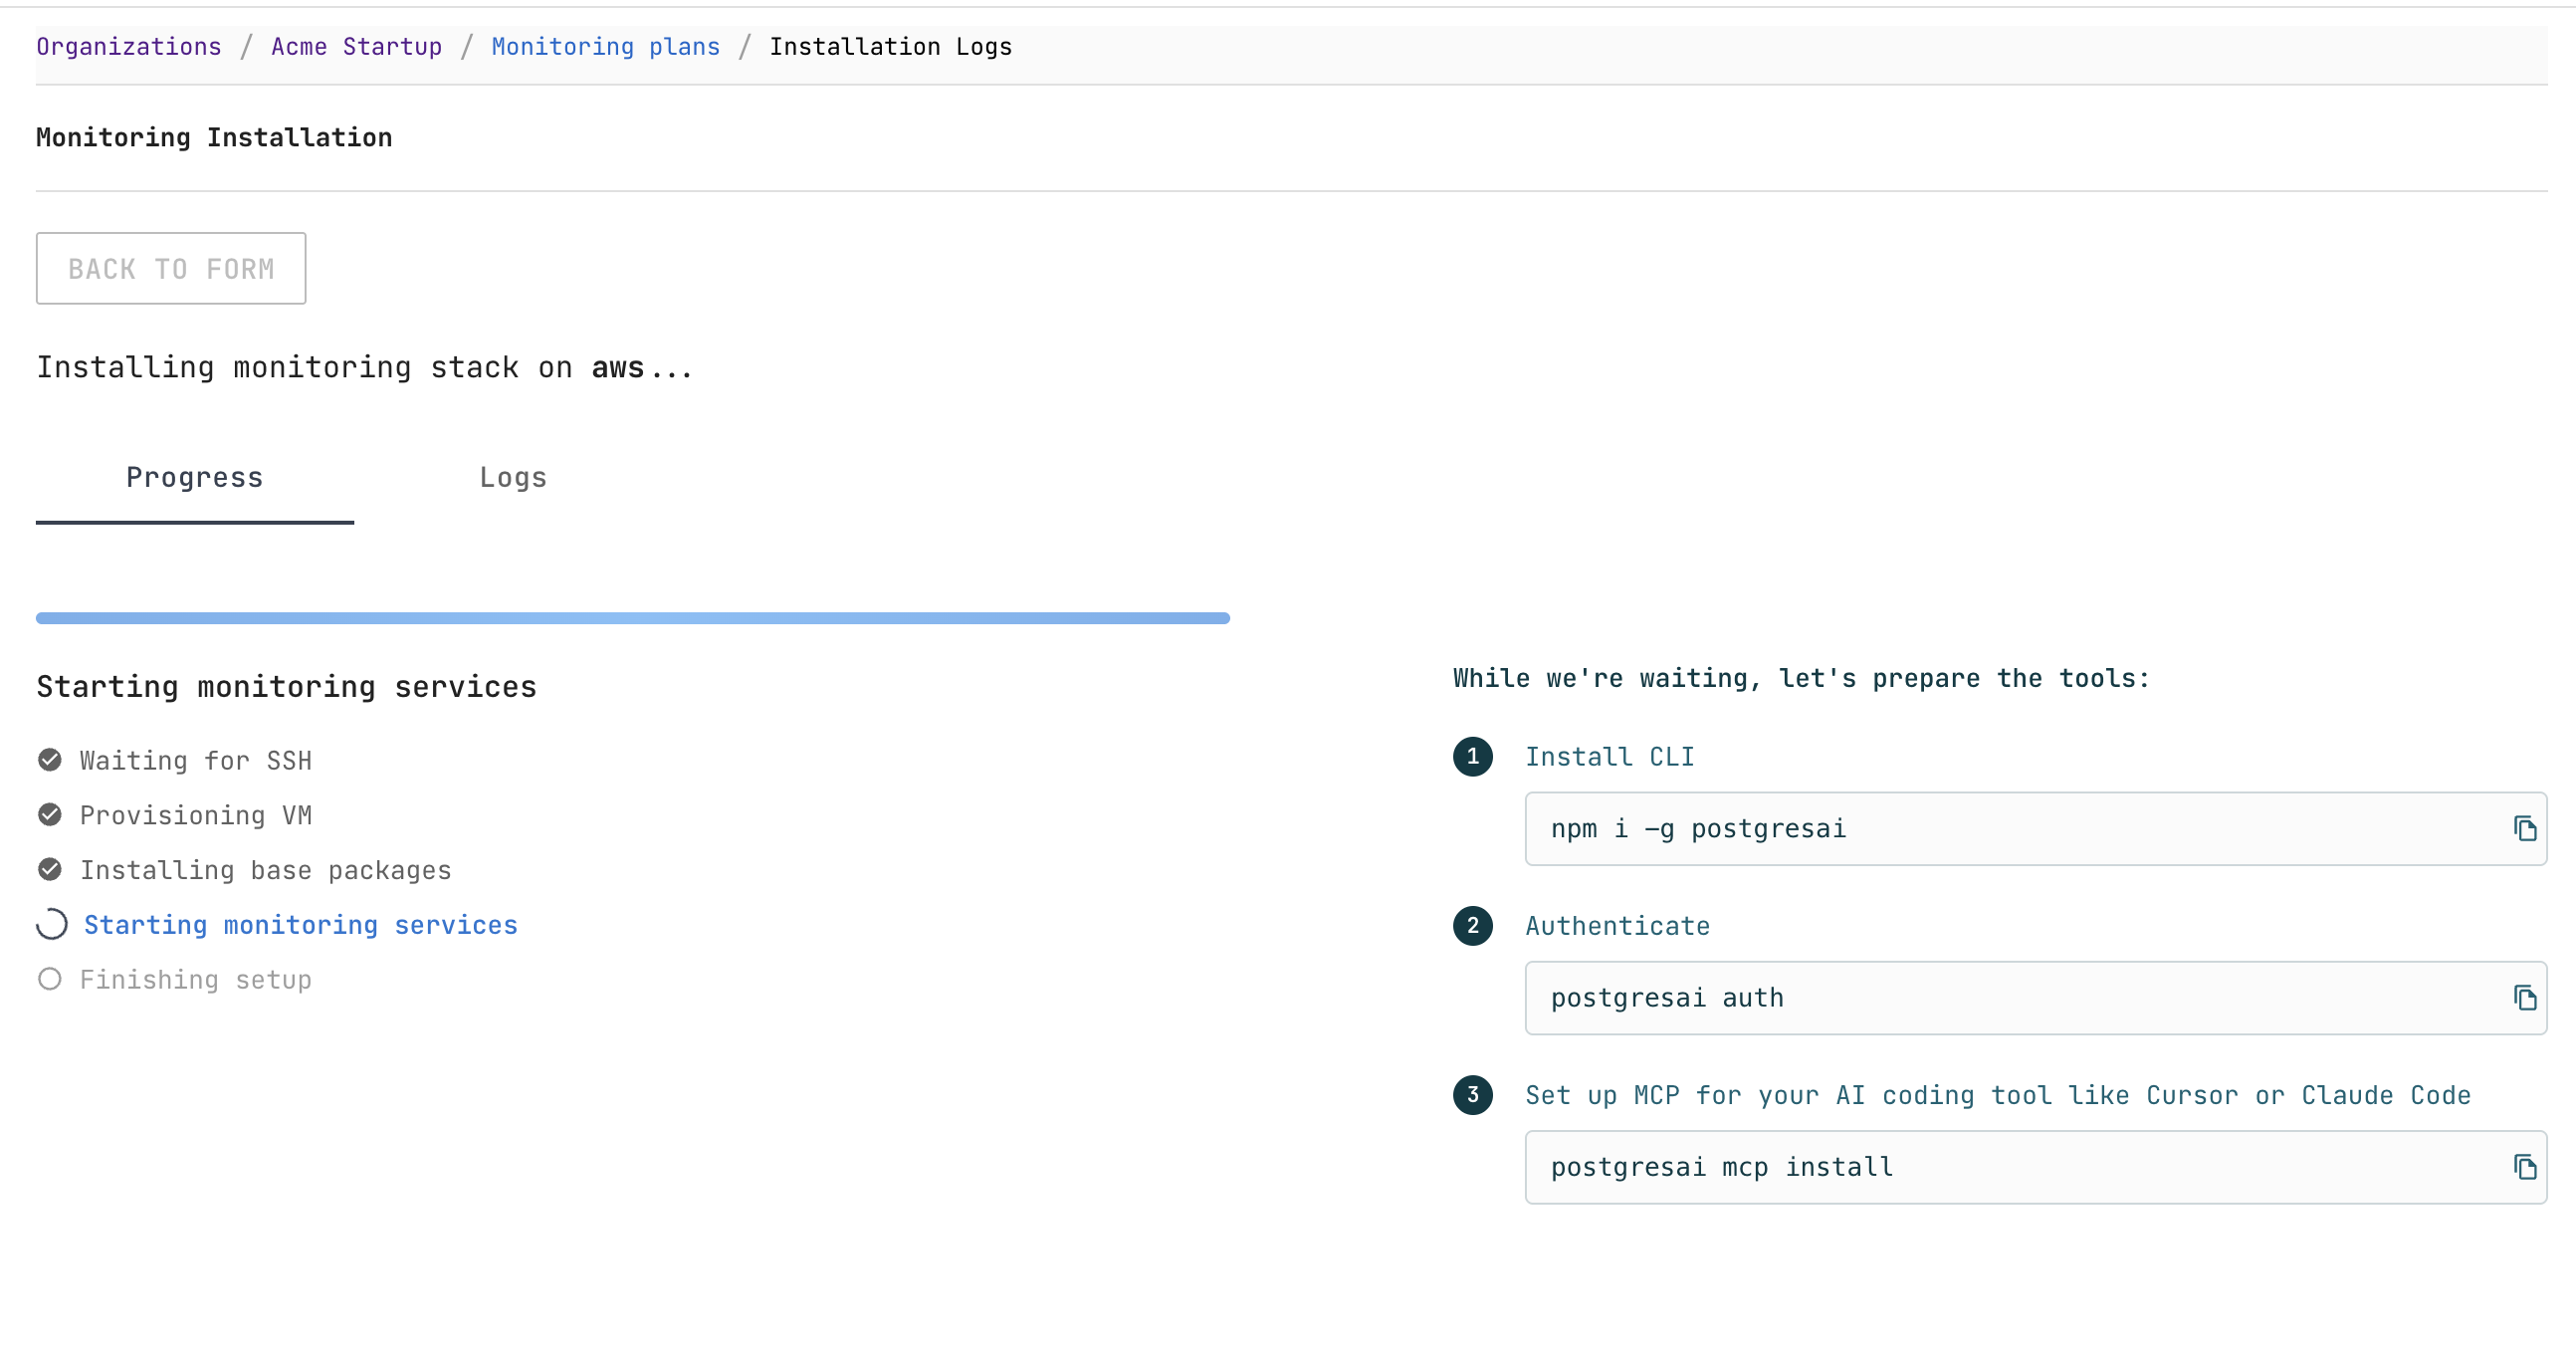
While waiting, you can set up the CLI tools:
# Install CLI
npm i -g postgresai

# Authenticate
postgresai auth login

# Set up MCP for your AI coding tool (Cursor, Claude Code, etc.)
postgresai mcp install
Step 6. Save Grafana credentials (Scale only)
Starter users: skip to Step 8 to review issues in Console. Grafana dashboards are not included in Starter.
For Scale, once the deployment completes, the page shows Deployment completed successfully! with your Grafana access details:
- URL — your dedicated Grafana instance
- Username —
monitor - Password — auto-generated
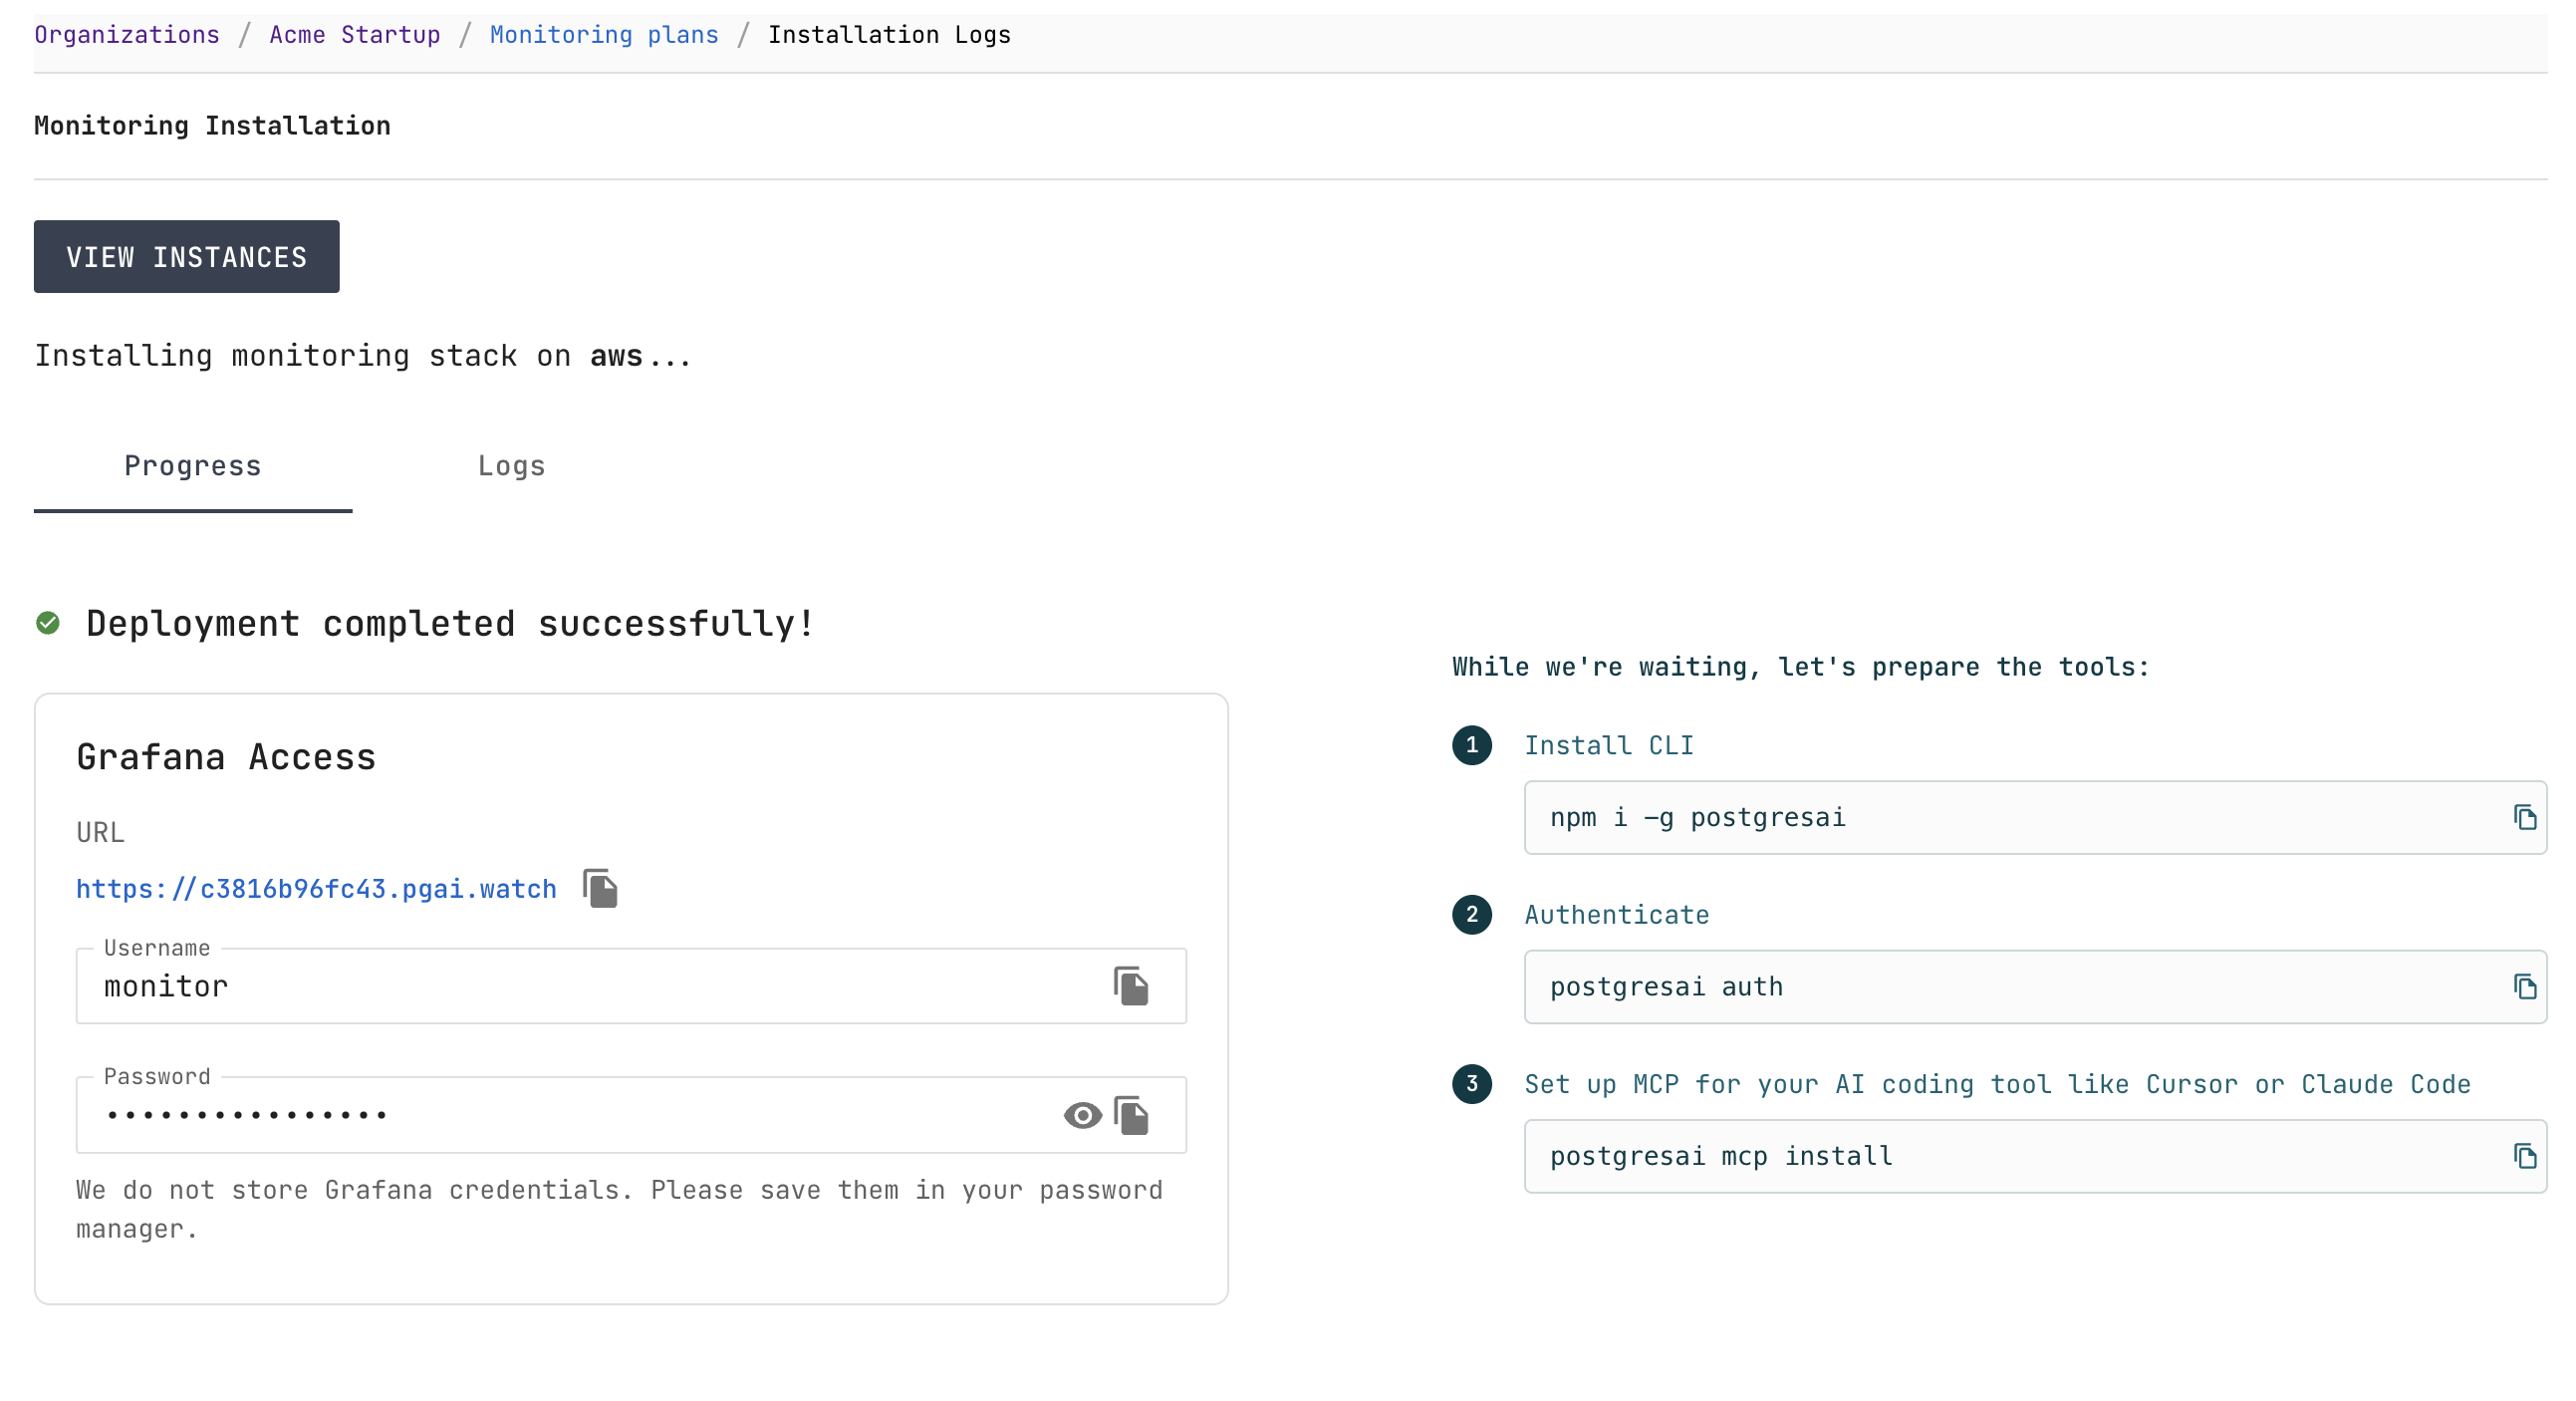
Save your Grafana credentials in a password manager — they are not stored in PostgresAI Console.
Step 7. Open Grafana dashboards (Scale only)
Open the Grafana URL from the deployment page. You can sign in using one of the following methods:
- Grafana credentials — use the username and password from the previous step.
- PostgresAI OAuth — click Sign in with PostgresAI for passwordless access.
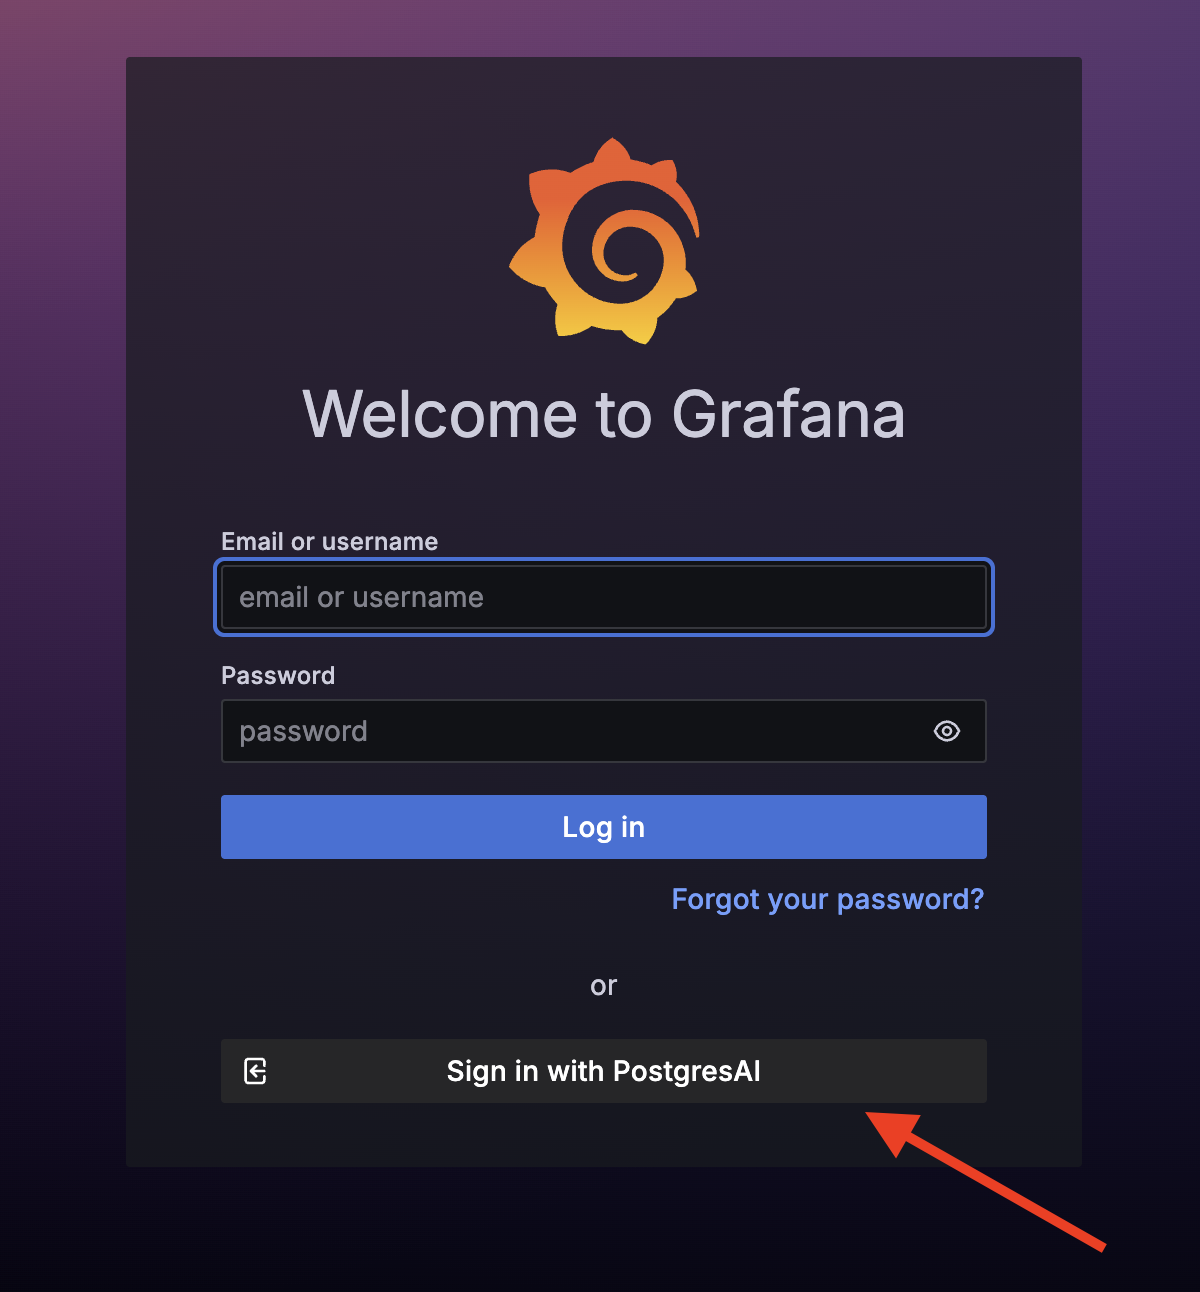
Start with 01. Single node performance overview (high-level) for a high-level health check of your Supabase database. Key panels to check first:
- Active session history (ASH) — wait events over time
- Sessions — active, idle, and idle in transaction connections
- TPS — transactions per second
- QPS — queries per second
Step 8. Review first issues
Monitoring is ready about 10 minutes after Deploy, and the first issues arrive within about 30 minutes. Navigate to Issues in PostgresAI Console to see detected problems and recommended actions.
After the first checkup, a checkup runs every day. Each issue covers one checkup type: a later daily checkup does not open a second issue of the same type, and does not reopen one you closed. Every Monday (from 15:00 UTC), a weekly review issue arrives with the week's verdict, actions and top queries.
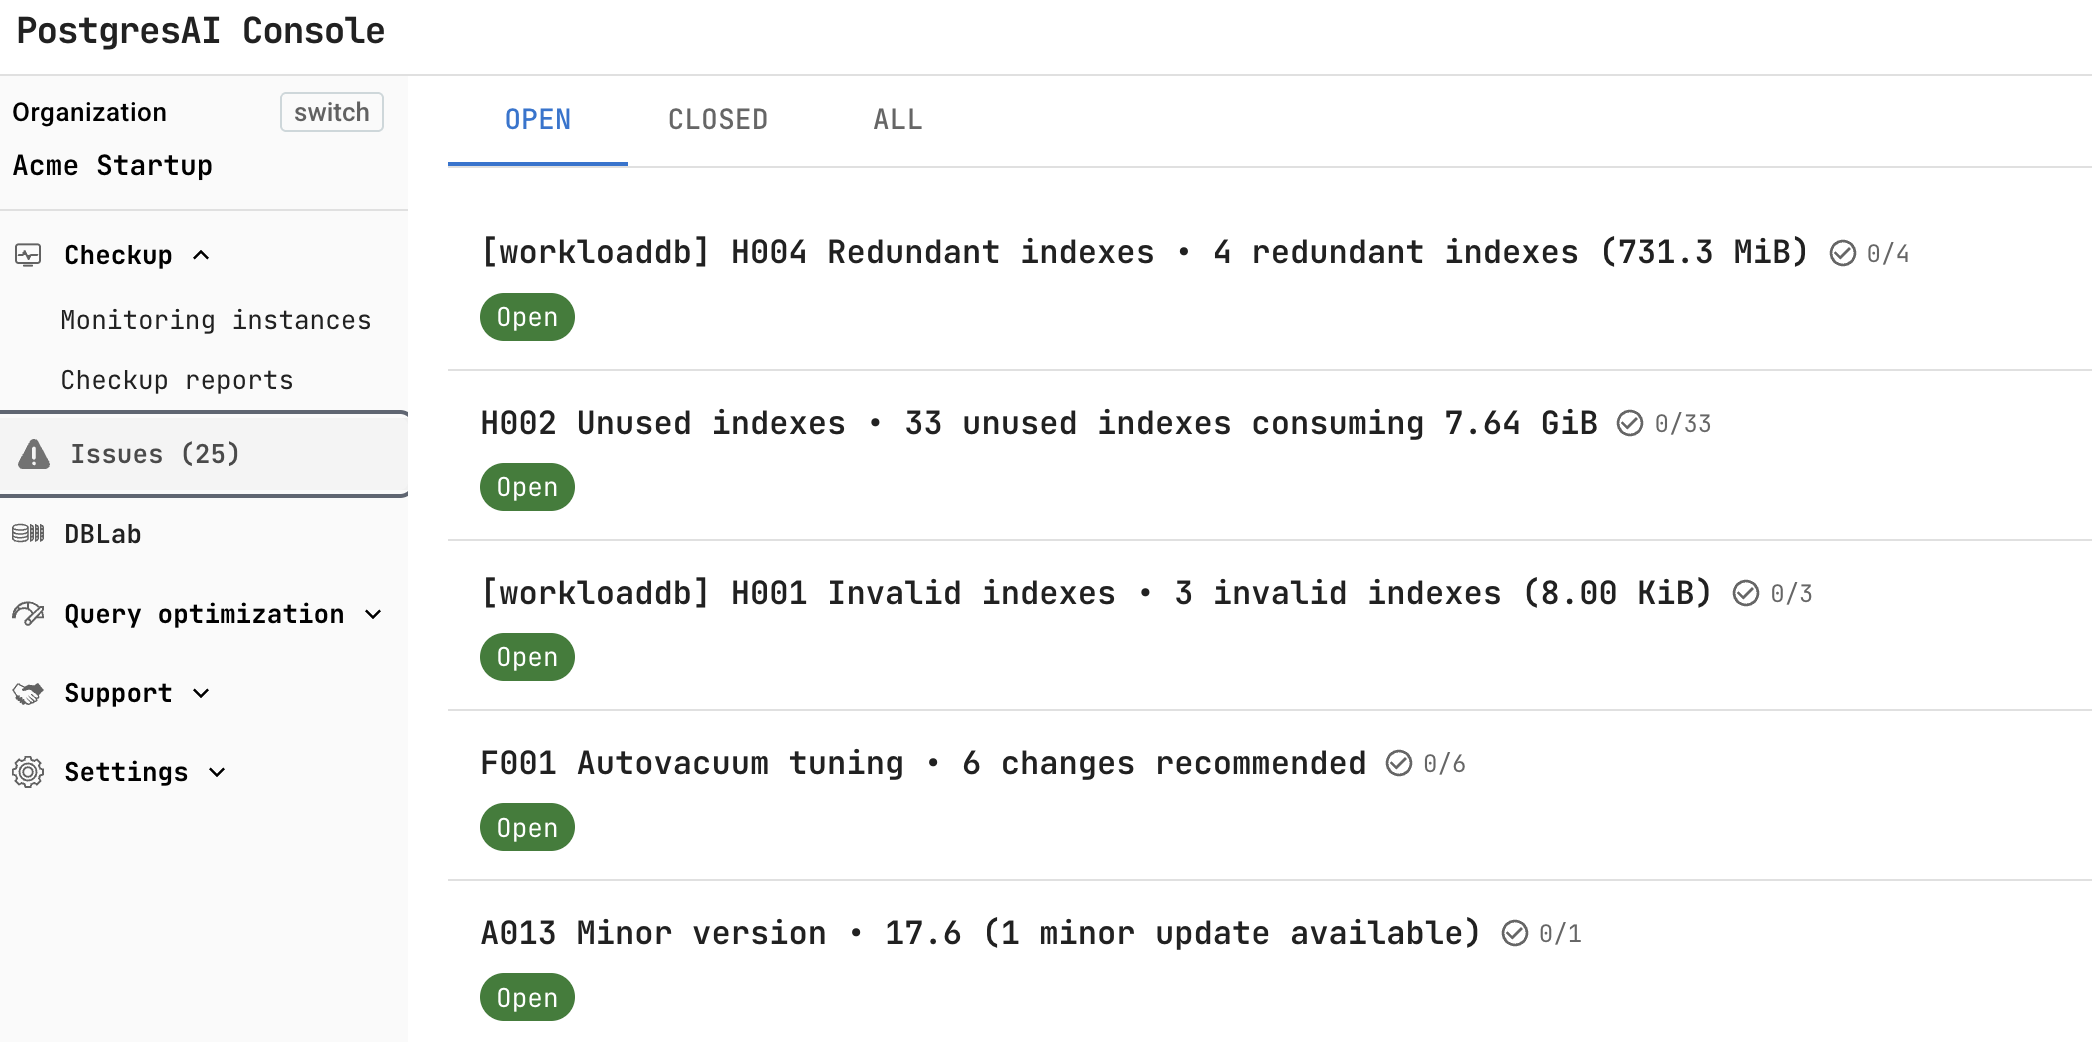
Common issues detected automatically include:
- Redundant indexes — duplicate indexes wasting storage
- Unused indexes — indexes that are never scanned
- Invalid indexes — indexes that failed to build
- Autovacuum tuning — recommended configuration changes
- Minor version updates — available PostgreSQL updates
See How to work with issues for details on managing issues, assigning team members, and integrating with AI coding tools.
Next steps
- Dashboard guide — complete dashboard reference
- PostgresAI CLI — CLI setup and commands
- MCP integration — set up MCP for Cursor, Claude Code, or other AI coding tools
FAQ
What database role is created and what permissions does it have?
Supabase setup creates, through the Supabase Management API:
- the role
postgres_ai_mon, a member ofpg_monitor; - the schema
postgres_ai; - the extension
pg_stat_statements, if it is not there yet; - the views
postgres_ai.pg_statisticandpublic.pg_statistic; - the
SECURITY DEFINERfunctionpostgres_ai.table_describe.
The CLI prints the SQL of the same steps for other databases (there, table_describe is
SECURITY INVOKER and there is no public.pg_statistic):
npx postgresai@latest prepare-db --print-sql
npx postgresai@latest unprepare-db drops the role, the postgres_ai.pg_statistic view and the
table_describe function. It leaves the postgres_ai schema, public.pg_statistic and
pg_stat_statements in place.
What data is collected from my database?
Metadata: system view statistics, wait events, object names, and query texts with $1, $2 in
place of parameters. No table data and no application data.
One exception is on by default: the health check includes the first 500 characters of the query
that holds the xmin horizon, as written, so it can contain literal values. Set
postgresai.capture_query_preview=off to disable it.
For host stats, PostgresAI reads the project's secret key on demand, never stores it, and logs each use.
To review exactly what metrics are collected, examine the metric definitions:
- Prometheus sink metrics: metrics.yml (pgwatch-prometheus)
- PostgreSQL sink metrics (including normalized queries): metrics.yml (pgwatch-postgres)
See also: data privacy details.